

Sometimes we need a no-fuss, tried-and-true side dish to serve with our main course, something to complete the meal without expending all this extra energy. Well, roasted fingerling potatoes are that dish.
Unlike other potato dishes, there is no need for boiling water, incessant fork-tender tests, food processors, or electric beaters. All you need is a baking sheet and a little bit of time. Toss them with some butter and spices, throw them in the oven, flip them, and serve them! That’s it!
Our garlic and dill roasted fingerling potatoes will become a staple in your household, whether you are serving it alongside a nice caramelized steak or our chicken breasts in white wine, mushroom, and caper sauce. They are incredibly versatile and just plain good.

Need-to-Know
The Potatoes Should be Room Temperature
Before tossing the potatoes with melted butter, ensure the potatoes are at room temperature. This step will help to prevent the butter from coagulating immediately upon contact with the cold potatoes.
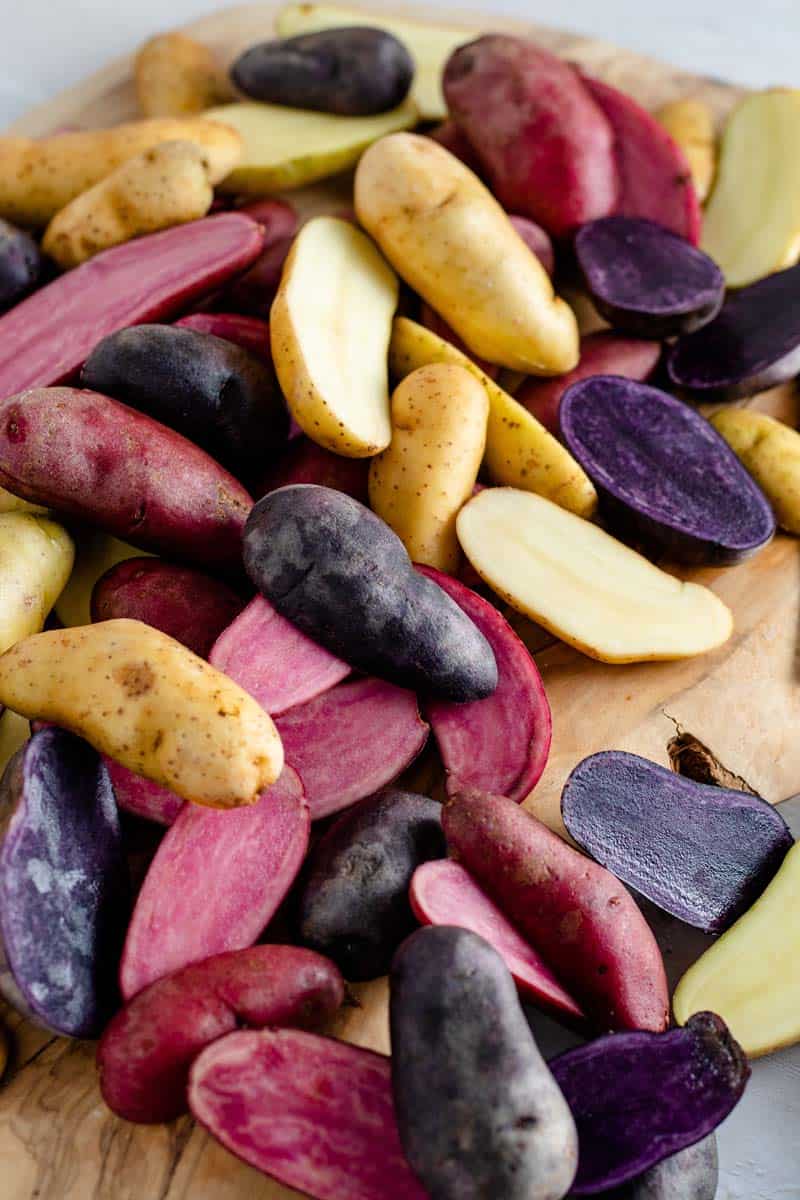
Cut the Potatoes Lengthwise
The beauty of fingerlings is that they are small, and they don’t take long to cook and become golden brown on the outside and soft on the inside. To ensure all the potatoes cook evenly and become golden brown on the flesh side of the potato, cut the potatoes in half, lengthwise.
Tips on Seasoning
Although we provide measurements for the garlic powder, dill, and salt, we don’t offer them for ground pepper since we expect that you will be using a cracked pepper mill. For any roasted vegetable recipe, the rule of thumb is to generously season every vegetable with salt and ground pepper. So, when the time comes to season the potatoes with ground pepper, generously crack the pepper over all sections of the potatoes and mix them well with your hands before adding them to the baking sheet. The ground pepper should be visible on each potato.

Don’t Crowd the Potatoes on the Baking Sheet
When arranging the seasoned potatoes on the baking sheet, be careful not to overcrowd them. Ensure that each sliced potato has adequate contact with the baking sheet to allow it to become crispy and golden brown.
Flip them Half Way through the Process
The potatoes will undergo two baking sessions. Halfway through the baking process, flip the potatoes over to ensure both sides become crispy and golden brown. Some potatoes will become golden brown after the first bake. Others will have to be flipped flesh-side down for the second bake to ensure they too become golden brown.

Herbs and Spices You Can Add
We keep this recipe relatively simple, but you are welcome to add some additional spices to mix up the flavors. Here are some noteworthy additions:
- Thyme Leaves
- Dried Oregano
- Smoked Paprika
- Dried Tarragon
- Dried Rosemary
- Flat-leaf Parsley

Main Course Accompaniments
- Chicken Breasts in White Wine, Mushroom, and Caper Sauce
- Grilled Pork Tenderloin with Chimichurri
- Seared Steak with Garlic Butter
- Steak au Poivre
Reheating and Storage
Store leftover potatoes in an airtight container in the refrigerator and consume them for up to 4 days. To reheat them, place them in the microwave for one minute at 70% or until warm throughout.

Purge Your Fridge
You just finished scarfing down our roasted garlic, and dill fingerling potatoes, and you are left with some dill. Here are some tasty options to rid your fridge of the excess dill:
Ingredients
- 30 oz. fingerling potatoes 840 grams
- 2 tbsp unsalted butter
- 1/2 tsp garlic powder
- 1 tbsp dill finely chopped
- 1 tsp salt
- ground pepper
Instructions
1. Clean and Cut the Vegetables
- Preheat the oven to 400 degrees Fahrenheit (204 degrees Celsius).
- Clean the fingerling potatoes.
- Slice each fingerling in half lengthwise. Set aside.
- Clean and finely chop the dill. Set aside.
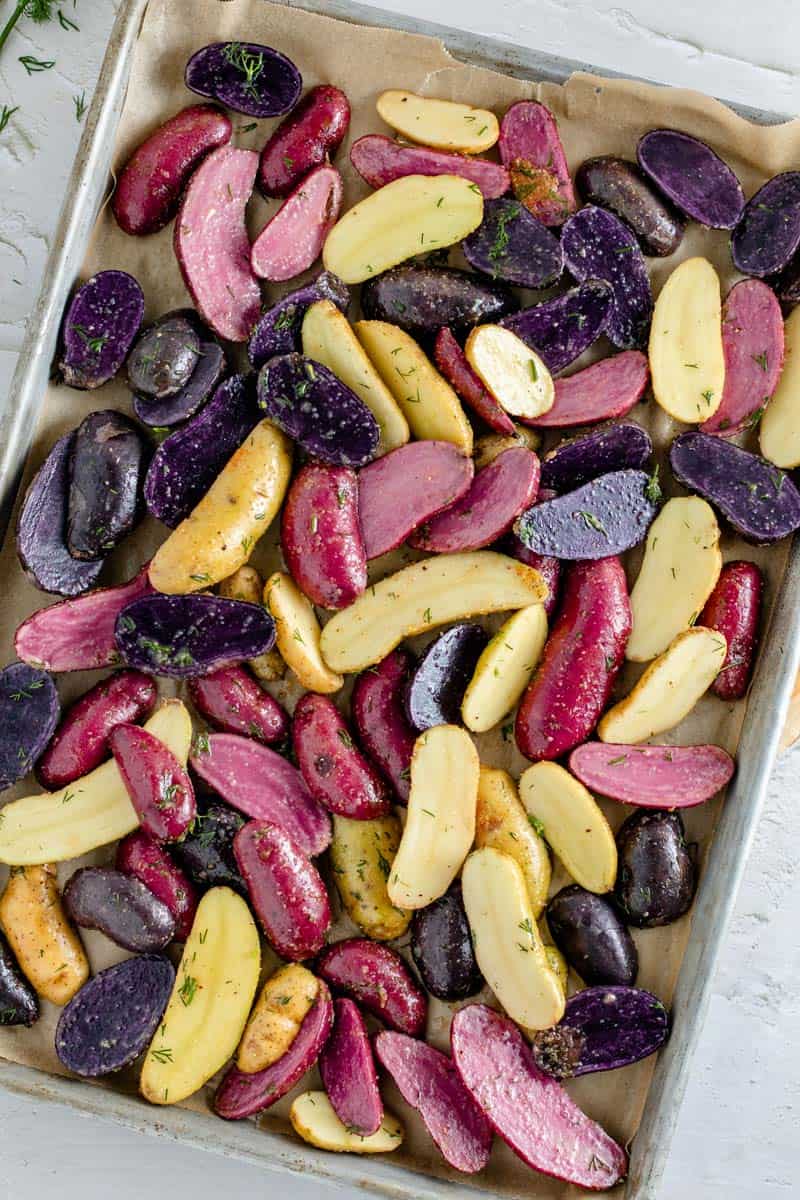
2. Toss the Potatoes in Oil and Season Them
- Place a saucepan on the stovetop at medium heat. Melt the butter.
- Combine potatoes, melted butter, garlic powder, dill, salt, and pepper in a mixing bowl.
- Toss well to ensure potatoes are well coated in all the ingredients.
- Pour and evenly distribute potatoes onto a baking sheet.
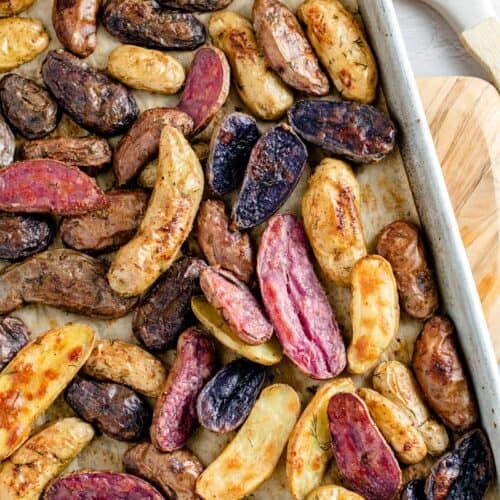
3. Bake for 50 minutes
- Bake for 25 minutes.
- Flip the potatoes over using a spatula.
- Bake for 20-25 minutes or until soft on the inside and golden brown and crispy on the outside.
4. Let’s Plate
- Remove the potatoes from the oven.
- Serve and enjoy.


Leave a Reply